Table of Contents
ToggleThe Dancer job in Final Fantasy XIV has carved out a unique niche in the community since its introduction in Shadowbringers. It’s a ranged physical DPS that plays completely different from other jobs, instead of rotations built on cooldown management, the Dancer relies on randomized procs and rapid decision-making to maximize damage. Whether you’re stepping into the Final Fantasy Dancer role for the first time or refining your techniques at endgame, understanding the nuances of this job is critical for performing well in raids and dungeons. This guide covers everything from unlocking your Dancer in FFXIV through optimization strategies for current content, giving you the knowledge to dance circles around the competition.
Key Takeaways
- The FFXIV Dancer is a ranged physical DPS that relies on randomized procs and quick decision-making rather than rigid rotations, making every encounter feel dynamic and rewarding skill expression.
- Dancers excel at mobility and group utility, maintaining full damage output while moving and providing 5% damage buffs to partnered melee DPS plus crit boosts to nearby allies.
- Unlock Dancer at level 60 via the ‘Shall We Dance?’ quest in Limsa Lominsa, then level efficiently through MSQ Roulette, Palace of the Dead, or dungeon spam depending on your current level.
- Master the priority system: keep Standard Step on cooldown, use Technical Step when available, weave procs immediately, and use Flourish off-cooldown while maintaining your basic combo as filler.
- Dancer’s stat priority is straightforward—Dexterity > Critical Hit > Determination—with minimal stat optimization needed for casual content, making gearing accessible for new players.
- Avoid common mistakes like ignoring procs, holding abilities for perfect moments, or standing still during mechanics; instead, stay mobile, react instantly to procs, and let resource management happen naturally.
What Is the Dancer Job in Final Fantasy XIV?
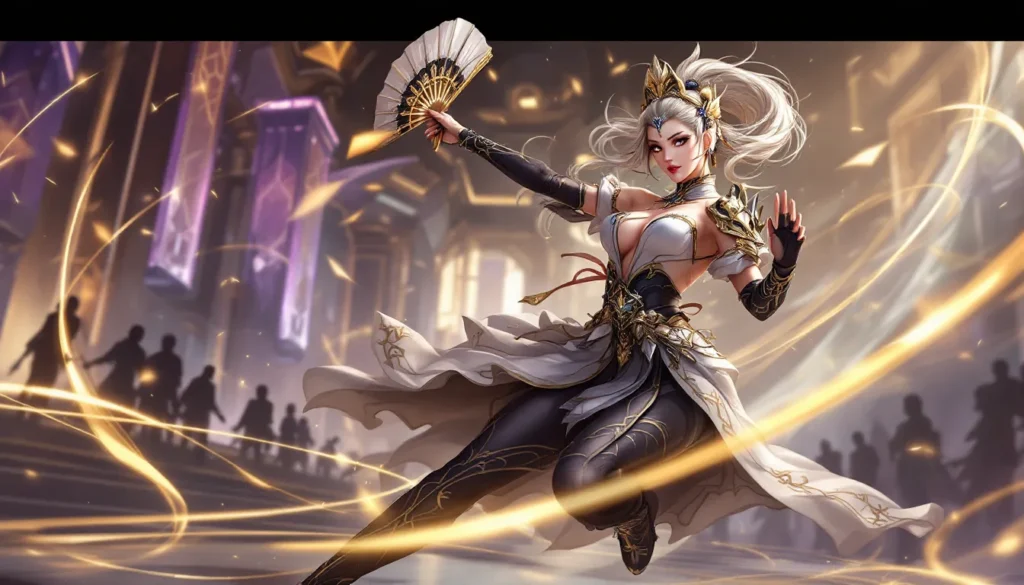
The Dancer is a ranged physical DPS job that uses fan weaponry and employs a dance-based combat system unlike any other role in the game. Rather than following a rigid rotation of abilities, the Dancer triggers random procs through basic attacks that execute step abilities, combinations that chain together for massive damage spikes. This means every fight feels dynamic: you can’t simply autopilot through encounters.
Dancers fill the ranged DPS slot alongside Bard and Machinist, but they operate on fundamentally different principles. While Bards manage songs and dots, and Machinists juggle heat gauges, Dancers react to procs and maintain Esprit resources. The job’s role identity centers on finesse, quick adaptation, and partnering with a melee DPS to amplify group damage through the Dance Partner ability.
The job excels in dungeons and raids where movement and unpredictability matter. You’re not locked into a spreadsheet of optimal buff windows: instead, you respond to what the fight throws at you. This appeal, the blend of flashy combat and tactical depth, has made Dancer one of the most popular DPS jobs in FFXIV since its debut. The Final Fantasy 14 Dancer also brings a ton of personality through emote-based animations, making it visually distinct from every other job.
Dancer Strengths and Weaknesses
Key Strengths
Dancers bring several critical advantages to group content. Mobility is arguably their greatest strength, they maintain full damage output while moving, unlike Dragoons or Monks. In fights with heavy mechanics or arena-wide AoEs, this flexibility keeps your DPS stable while others scramble.
Party utility sets Dancers apart from pure DPS roles. The Dance Partner buff increases a melee DPS’s damage by 5%, and Standard Finish provides a 5% crit rate boost to everyone nearby. These contributions matter in high-level raiding: guilds value the added throughput.
Proc-based gameplay creates high skill expression. Good Dancers recognize patterns, anticipate procs, and optimize their weaving to extract maximum damage. There’s no single “right” way to execute a fight, adaptability is rewarded.
AoE damage is solid, especially with Fountainfall and multi-target combo finishes. Dungeons become faster runs with competent Dancer DPS.
Notable Weaknesses
The randomness that makes Dancer engaging can also feel punishing. RNG dependency means some pulls generate fewer procs than others, creating variance in DPS output. You can’t control when procs drop, so consistency suffers compared to jobs with rigid rotations.
Dancers lack personal defensive cooldowns. You have no equivalent to a Dragoon’s Life Surge or a Monk’s Riddle of Earth. Survivability relies entirely on your healer and positioning.
Single-target damage potential lags slightly behind top-tier DPS at endgame. While perfectly acceptable, you won’t lead DPS meters in optimized groups. This matters less in casual content but becomes noticeable in Savage raids.
The job also demands higher APM (actions per minute) than some alternatives. Constant weaving, proc management, and positional adjustments require active engagement throughout a fight.
Getting Started: Unlocking and Leveling Dancer
Prerequisites and Unlock Requirements
Unlocking the Dancer class is straightforward but has one critical requirement: you must have reached level 60 on any combat job. This locks new players out until they’ve progressed through the main story to Stormblood.
Once you meet that threshold, head to Limsa Lominsa in the Lower Decks and speak to the Wandering Minstrel NPC near the Aetheryte Plaza. He offers the quest “Shall We Dance?” which is your official unlock. Complete the short introduction sequence, and you’ll gain access to the Dancer job at level 60.
Before starting, grab a Dancer’s Arms from the Market Board or your Grand Company’s equipment vendor. You technically start with a basic fan, but buying appropriate gear saves you early struggles.
Efficient Leveling Strategies
From level 60-90, your primary goal is climbing through the FFXIV expansion content. Here are the fastest routes:
Main Scenario Quest (MSQ) Roulette remains king for raw experience, especially if you’re new to content. Each run grants 3+ million EXP. If you’re doing MSQ anyway on an alt, this is painless.
Palace of the Dead (Levels 60-70) offers consistent, low-stress leveling. Queue times are instant, and the job teaches fundamentals without penalty for mistakes. Run 50-100 floors for a smooth climb to 70.
Heaven-on-High (Levels 70-80) is the spiritual successor and slightly faster. Same concept, better pacing.
For level 80-90, dungeons become competitive with roulettes. Spam the latest leveling dungeon (currently Ivoire, pending patch changes). Duty Finder queues are instant for DPS, and each run is 20-25 minutes for decent exp.
Daily Roulettes (Leveling, Alliance Raid, Normal Raid) provide steady chunks when combined with dungeon grinding. Prioritize Leveling Roulette for the exp bonus.
Tip: Don’t stress about optimal rotations while leveling. Learn the basics, focus on not dying, and push buttons. The job reveals itself naturally as abilities unlock. You’ll gain Standard Step at 60, Technical Step at 70, and Flourish at 72, each fundamentally changes how you play. By 80, the full kit is there.
Core Mechanics and Rotation
Understanding Dance Steps and Procs
The Dancer’s combat system revolves around Standard Step and Technical Step, two distinct dance combos you execute by pressing directional buttons (Emote system). When you cast Standard Step, you’ll see four arrows on screen. Press the corresponding WASD keys (or controller buttons) in sequence. Success grants a Step Combo that finishes with bonus potency.
Standard Step (60s cooldown) generates basic damage and procs for the next abilities. It’s your bread-and-butter proc-generating tool, cast it often and cleanly.
Technical Step (120s cooldown) is the heavyweight. It’s a longer, more complex dance that rewards clean execution with massive damage and buffs for your entire group. Missing even one step downgrades the finish potency, so focus here.
Randomly, your basic attacks (Cascade and Fountain) trigger Proc alerts for Reverse Cascade or Fountainfall. These hit much harder than the base combo and are your priority windows. Weave them instantly when they pop.
Flourish (30s cooldown, unlocked at 72) automatically triggers two random procs. It’s a powerful damage button that you’ll weave whenever available.
Building Your Rotation
There’s no rigid rotation in the traditional sense. Instead, you follow a priority system:
- Keep Standard Step on cooldown. It’s your main oGCD weaver.
- Use Technical Step whenever available. Only skip if fight mechanics force it.
- Weave procs (Reverse Cascade/Fountainfall) immediately. Never let them sit.
- Use Flourish off-cooldown. It’s 100% uptime.
- Maintain your melee combo (Cascade → Fountain → Finishing Move) as filler between procs.
Example sequence: Cast Cascade, proc triggers → weave Reverse Cascade, cast Fountain, cast Standard Step, weave Shine Step combo, back to Cascade. The exact order shifts based on what procs, but priorities remain constant.
AoE rotation shifts when three or more enemies are present. Use Windmill and Fan Dance IV instead of single-target combos. Technical Step and procs still apply, so prioritization doesn’t change, just spam AoE actions.
Esprit and Resource Management
Esprit is the Dancer’s secondary resource, built through basic attacks and combo finishes. You can’t manually spend it: instead, certain abilities automatically consume 50 Esprit when available. Devilment (60s cooldown, level 82) and Starfall Dance (level 90) spend Esprit for massive burst.
Keep Esprit capped. Let it overflow, and you waste generation. Conversely, spending it before hitting 100 is inefficient. The sweet spot is staying between 70-100, full enough to use abilities when they come off cooldown, but flexible if Esprit generation spikes.
Don’t overthink this. As long as you’re pressing buttons and using your cooldowns, Esprit management happens naturally. The resource is forgiving compared to other jobs.
Best Gear and Stat Priorities
Recommended Gear Progression
Gear progression in FFXIV follows clear tiers. As of patch 7.1, here’s the roadmap:
Leveling (60-80): Grab level-appropriate Ironworks or Scaevan gear from tomestone vendors. Don’t buy Savage gear, it’s overkill for dungeons.
Level 90 Catch-Up: New players should farm Poetics tomestones for Augmented Cryptlurker gear. It’s 630 item level and carries you through Normal raids and current dungeons effortlessly. Takes about 10-15 roulettes to fully equip.
Current Endgame (Patch 7.1): Mythril tomestones buy Chhoragi gear (660 item level). Raid drops offer Anabaseion gear (665 item level) from Normal raids and higher from Savage. The gap between Mythril and Savage drops is roughly 30 item levels, manageable but noticeable.
Ultimate weapon holders flaunt Augmented Endsinger’s Salvific Arm (730 item level), but that’s reserved for players clearing deep endgame content. Don’t stress about it unless you’re pushing Savage.
Gear optimization mattered more in earlier expansions: now, the stat squish has compressed differences. A 30 item-level gap is maybe 5-8% damage, not the 20%+ swings of Shadowbringers.
Stat Priorities and Materia Melding
Dancer’s stat priority is clean: Dexterity (main stat) > Critical Hit > Determination > Direct Hit > Spell Speed.
Dexterity scales your weapon damage directly. Prioritize this on every piece.
Critical Hit amplifies your damage by up to 25% against a 3% base crit rate. It’s your best secondary stat, and gear is designed around it.
Determination provides flat damage increases. It’s weak compared to Crit but stacks on most gear, so you’ll naturally have high Determination.
Direct Hit (increased damage against a baseline) is below Determination in most scenarios. Bards and Machinists prefer it more than Dancers.
Spell Speed is nearly useless for Dancer. You’re not casting spells, and GCD reduction matters less for a proc-based job.
For materia melding, cap Crit Hit first. Once you hit the soft cap (~2700), meld Determination. If you’re pushing Savage, some guides recommend specific Crit/Det ratios, but the difference is marginal for casual players.
Don’t get paralyzed by stat optimization. Equip higher item level gear and meld Crit materia. You’ll be 99% optimized. Advanced optimization strategies exist in community resources, but they yield minimal gains for most players.
Advanced Tips for Optimizing Dancer Performance
Positioning and Movement
Dancer thrives in mobile scenarios. Unlike Dragoons, you can strafe, backpedal, and reposition without dropping damage. Exploit this.
Always maintain your melee range (3 yards from the boss). Too far out, and your combo breaks. Too close, and you risk cleaves. Find the sweet spot where you can attack and sidestep mechanics simultaneously.
Pre-position before unavoidable damage. In raids, you’ll know where cone AoEs or spread markers drop. Move there during GCD downtime so you’re in place when the mechanic resolves. This prevents clunky repositioning mid-rotation.
Use Peloton (30% sprint buff, 30s duration, level 92) before combat and to catch up after knockbacks. It expires when you engage, so cast it proactively.
Good positioning allows you to maintain uptime. A Dancer stuck out of range because they were greedy with positioning is worthless. Survival first, damage second.
Raid and Dungeon-Specific Strategies
Dungeons are straightforward: spam AoE, stay alive, avoid standing in bad. Dungeons don’t require advanced strategy, just good fundamentals. Weave procs, use Flourish, and keep moving. If you’re regularly wiping in dungeons, you have a survivability problem, not a Dancer problem.
Normal Raids are mechanically easier versions of Savage. Learn the fight layout, position accordingly, and execute your normal rotation. Nothing Dancer-specific applies here beyond standard play.
Savage raids demand tight execution. You’ll need to pre-plan your burst windows (Devilment + Starfall Dance) around raid buff timings (Trick Attack from Rogue, Battle Litany from Dragoon). Coordinate with your static to align damage phases. This is where Dancer’s utility shines, your crit buff and Dance Partner amplification create multiplicative gains.
Use resources like raid guides on Twinfinite to study specific encounters. Knowing mechanics 48 hours before your static’s raid night gives you a massive edge.
Partner Considerations and Utility
Dance Partner is your most important utility tool. You permanently link to another melee DPS (Dragoon, Rogue, Samurai, or Reaper), granting them 5% additional damage. The partner role is permanent once selected, so choose wisely.
Partner your strongest or most geared melee DPS. A 5% buff on a high-damage player multiplies better than on a low-damage player. In a static, this should be intentional, work with your team to maximize party-wide damage.
Crit buff from Standard Finish (2-6% depending on steps) and Devilment (crit and direct hit boosts) benefit the entire group. You’re not a selfish DPS: your cooldowns lift everyone.
Dancers lack defensive support (shields, heals, mitigation). Your job is staying alive and outputting damage. If you’re dying, stop doing mechanics wrong, that’s on you, not your healer. Conversely, if your healer is constantly rescuing you, adjust your positioning and cooldown expectations.
In dungeons, communicate with your healer if pulls are getting tight. Tell them when you’ve got Sprint and Peloton for extra mobility. These small conversations prevent wipes.
Common Mistakes and How to Avoid Them
Ignoring procs. This is the #1 Dancer mistake. Procs highlight on your screen and sometimes flash your hotbar. If you’re ignoring them in favor of your regular combo, you’re throwing damage away. Procs are always priority: treat them like emergency oGCDs that supersede everything except movement.
Holding abilities for “perfect” moments. Beginners often save Technical Step or Flourish for raid buffs, thinking they’ll stack for mega bursts. This logic is flawed. Use abilities on cooldown. Yes, late-raid-tier optimizations align cooldowns strategically, but you’re not at that level yet. Pressing buttons off-cooldown beats holding them 99% of the time.
Standing still during mechanics. Dancer is mobile: use that advantage. Standing in a cleave or chain AoE because you wanted to finish a combo is amateur-hour stuff. Move preemptively and let your natural proc generation carry damage between repositioning.
Obsessing over single-target rotation order. The exact sequence of Cascade → Fountain → procs varies slightly based on RNG. Some players create spreadsheets to optimize this. It’s unnecessary. Follow priorities, execute cleanly, and let proc variance happen. The difference between “optimal” and “good” is negligible.
Neglecting your Dance Partner utility. You’re bringing a 5% damage buff to an ally. Communicate with your team about who benefits most. A static that coordinates this beats one that doesn’t.
Dying to avoidable mechanics. As Dancer, you have zero excuses for dying to static arena hazards or well-telegraphed attacks. You move faster than other DPS: exploit that. If you’re spending more time dead than alive, re-examine your positioning and healer communication.
Melding wrong stats. New players sometimes meld Direct Hit or Spell Speed because they sounds good. Stick to Crit → Determination. Resources like Siliconera’s coverage of FFXIV patches sometimes detail meta shifts, but stat priority has been stable for years.
Wasting Esprit. Letting Esprit cap and overflow is momentum loss. You should spend Esprit roughly when you hit 100, or hold it if a big burst window is seconds away. Again, don’t overcomplicate it, press your buttons and let Esprit management happen naturally.
Conclusion
The Dancer in FFXIV stands out as a job that rewards both mechanical skill and adaptability. Its proc-based system, party utility, and superior mobility create an engaging experience that differs fundamentally from traditional DPS roles. Whether you’re running casual dungeons or pushing Savage content, the core principles remain: react to procs, manage resources effectively, and keep your uptime high.
Starting your journey as a Dancer is accessible, unlock at level 60, grab some gear, and begin learning through dungeons and roulettes. The job teaches itself as abilities unlock, and the learning curve flattens quickly once you grasp the priority system. From there, optimization is iterative: refine your positioning, align cooldowns with raid buffs, and coordinate with your static.
Mastery comes from practice, not theory. Run dungeons, watch replays of your performance, identify gaps, and adjust. The Dancer job rewards this kind of engagement with tangible improvements in DPS and group performance. If you’ve been sitting on the fence about trying a new job, the dancer FFXIV role is worth the investment, fast-paced, visually distinct, and genuinely fun to pilot.


